Update! Using my HP-310 AIO computer as an easy home NAS! [Subject to change]
Posted on: 29 August 2025

Table of Contents
In May 2024, I made a YouTube video about me using my old Toshiba Satellite laptop as a home-made NAS and some things has changed since. So in this blog, I decided to make an update.
In that video, I discussed:
- What a NAS is
- What computer and hard drives I will be using
- How to install Ubuntu Server + Casa OS
- The speed of the NAS
- Connecting my NAS to my devices
- Using Tailscale for remote access
I will be regurgitating the info here for the purpose of putting it in blog form and to educate the people who have not watched my video some necessary information for my NAS update. So without furthur ado...
What is a NAS?
A NAS stands for: Network Attached Storage, and it's basically a smarter external hard drive or a server like Google Drive, Dropbox, or MEGA.
As I stated in my video, a NAS is essentially a computer that has a CPU, RAM, a motherboard, a host drive, and external hard drives that you attach to it. Many consumer NAS units (Synology, QNAP, Asustor, etc...) come with 2, 4, or 6 hard drive bays, allowing you to add multiple hard drives for more storage or redundancy. You can connect multiple devices like: your phone, tablet, and computer to it from your local network or anywhere in the world if you set up port forwarding or a VPN, but be safe and do it securely.
What did I change this time?
To be honest, not much really. I just changed the computer from my Toshiba Satellite L455-S5980 to my HP Touchsmart 310-1155f AIO PC and moved the hard drives around for a backup. The NAS is now 6TB instead of 12TB. I use the 2.5 external 2TB and a 4TB drives for the NAS and I use the 6TB Expansion drive as the backup. I even have a UPS as a power backup in case if the power goes out.


As for the computer, I chose it because it has a better cpu and it has more ram. Although, the compromise is that it's bigger than my Toshiba laptop and that it takes up more space on my desk.
As for the specs of the computer, it has a:
- AMD Athlon II X4 610e (4) @2.4 GHz CPU
- AMD ATI Mobility Radeon HD 4225/4250 GPU
- 8GB DDR3 RAM


But yeah, I just changed my computer and that's about it. However, the computer uses a 256GB HARD DRIVE, which is slower and dies sooner. In the future, I hope to get myself a 128GB SSD for the speed and lifespan. 128GB SSDs are pretty cheap, costing about $20 on Amazon, hence why I decided to add "subject to change" in the title of this blog.
What OS do I use for the NAS?
Same as the one in the video, I will be using Ubuntu Server and CasaOS.
Ubuntu Server - https://ubuntu.com/download/server
CasaOS - https://casaos.zimaspace.com/
There are tons of NAS OSes out there, like: TrueNAS Core/Scale, OpenMediaVault, Proxmox, Unraid, and etc... Those are really good operating systems and I have dabbled with them in the past, but I will using Ubuntu Server and CasaOS because of familiarity and ease of use. I have been on these 2 OSes for more than 1 year and I'm pretty familiar with it. CasaOS makes it easy to use by having a GUI interface and so far, I love it!
How do you install Ubuntu Server and CasaOS?
For Ubuntu Server, you first go to the website and download the .ISO file.


After that, you burn it to a USB using: Rufus, Balena Etcher, Linux USB Image Writer, and etc...


The installation of Ubuntu Server is super easy, you press the enter key on your keyboard a lot. You can skip Ubuntu Pro, I don't really have a reason why you need it. Here is the full installation of Ubuntu Server using Virtualbox:
^ Download this video! ^
Oh by the way, make sure to uncheck the LVM group because it splits your drive into multiple parts!

Once the installation is finished, you will find this screen and when you restart, it will give you your ip addresses.
↓ This is the finished installation in Virtualbox. ↓

↓ This is the finished installation currently on my HP 310. ↓

After Ubuntu server is done installing, I go to my main computer and ssh into it by typing in ssh username@server_ip. This is how you access your NAS server. On Windows if it doesn't work, enable OpenSSH Server in the optional features and that will fix it.
↓ SSHing into my NAS on both Windows and Linux. ↓


After that, do a quick 'sudo apt update' to keep things up to date.

And now here's where you install CasaOS. Go to their website and copy the command they give you on the front page and paste it into your terminal.
$ curl -fsSL https://get.casaos.io | sudo bash

When you press enter, the Casa OS will begin installing itself and at the bottom, it should give you an ip address that takes you to your browser.

It should take you to this screen where you create your account. Please remember, these are separate credentials that are used to access CasaOS, NOT connected to your NAS. Make the username and password the same as your NAS if you have trouble remembering 2 things at once.

Here's what the login screen looks like everytime you wanna login.

Anyways, once you login, you are greeted to the sweet interface of Casa OS.

The first thing I did when using Casa OS was I formatted my drives by going to the storage manager and then click on 'format'. I do this so that the NAS and OS can access and read and write to my drives. Remember that formatting drives will delete everything on it, so backup any important data that you deem valuable.

With that done, I go to: the files app, I click on one of the drives > go back to 'media' > and share the devmon folder. On the screen where it says "folder has been shared", there are copy buttons on the side of the network paths with the top one for Windows and the bottom one for MacOS/Linux.

You can use the network paths as a gateway to access your NAS in your file explorers. On Windows, I use the "network location" feature to access my NAS, however you can map your network drive if you want. Network location and network drive is the same thing, only that network drive gives your NAS a drive letter. On Linux, I use the built in network tools in the file explorer (whatever Linux distro works) and I add the network as a bookmark to access the NAS quickly.
↓ Accessing the NAS on my Windows and Linux file explorers on my local network. ↓


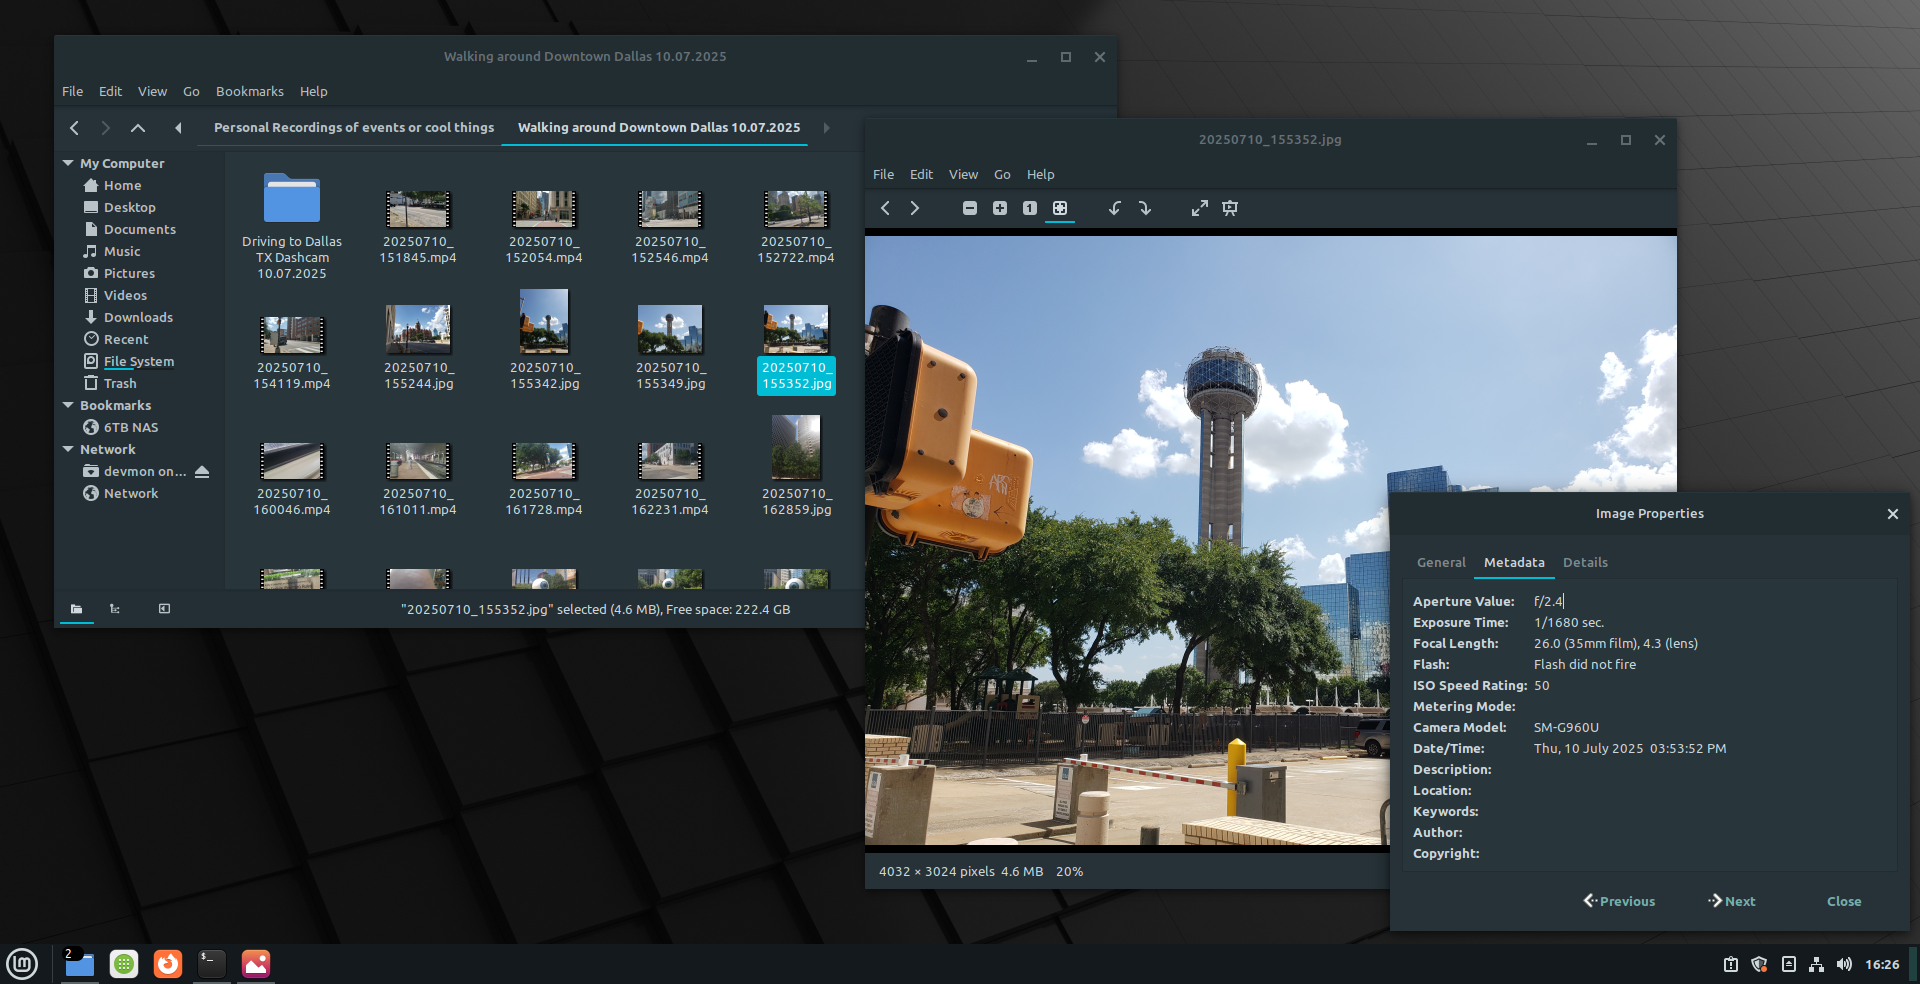
↓ Accessing a photo in the NAS on Linux Mint and my Android phone on my local network. ↓

What is the speed of the NAS?
The speed of a NAS depends on the network but also the hardware as well. Since I have a computer with a better CPU and RAM, the performance is definitely better than the laptop with speeds at around 40mb/s, although it does fluctuately and results could vary in the future.
↓ Speed of the NAS when copying an 8GB video file from my destop to a folder on the NAS on Windows and Linux. ↓


Using Tailscale for remote access.
I can access my NAS from all my devices on my local network which is great! But there are times when I want to access some files on my NAS from school, anywhere in my city or maybe anywhere the world. But have no fear, Tailscale is here and it can help me with what I need!
But first, what is Tailscale?
As the company calls it, Tailscale is a mesh VPN that enables encrypted point-to-point connections using the open source WireGuard protocol. The connection is streamlined and it's very easy to setup, hence why I am using it for my NAS.
For starters, go to Tailscale.com and create an account or login to an existing one. As for pricing, you can use Tailscale for free but it only limits you to 3 users, which is fine by me.

To add a device onto Tailscale, you go to the download section of the website and download Tailscale on whatever device that you have. For the purpose of this blog, I will choose Linux (since we're using Ubuntu Server) to show you how to download Tailscale on the NAS.

You simply SSH into your NAS from your main computer, and paste in the Linux command, and hit enter.
$ curl -fsSL https://tailscale.com/install.sh | sh

Tailscale will then install itself onto your NAS and after it's done installing, it will tell you to start the service by typing "sudo tailscale up" and it will give you a link that takes you your browser, with text saying "login successful" and that your device is added to the Tailscale console..
$ sudo tailscale up


Tailscale gives you a different ip address for your NAS and you can use that ip address to access your NAS everywhere you go, with an internet connection or a signal.

Of course, you can enter that ip adress into your web browser and you can access the network on Windows, Linux, and your phone.
Fun fact: when I went on vacation with family to California, I had the NAS turned on at home and used Tailscale to remote into the NAS from California all the way to my home in Texas and it was slow but it worked.

↓ I got these 2 screenshots from my HP Laptop that I dual-booted with a Windows 10 to 7 mod and Linux Mint XFCE. ↓


↓ To access the remote network on my phone, I had to download the Tailscale app, and now I can access my NAS on cellular data, and it works from anywhere in the world! ↓

But yeah, that's it! To summarize this blog post, a NAS (Network Attach Storage) is a computer with hard drives that you can connect to the internet to access anywhere in the world. It's essentially like Google Drive or Dropbox but YOU get to own and control them. Cloud storage is convenient, but in an age where a subscription costs an arm and a leg, having your own home server at that you can access anywhere and is cheaper in the long run might just be a smarter option.
In this blog post, what I did was essentially:
- Changed to a somewhat better computer
- Use Ubuntu Server as the server
- Use Casa OS as the easy GUI frontend
- Use Tailscale to access my NAS from anywhere in the world
Right now, my NAS is basic. In the future, I hope to create a NAS using a Raspberry Pi with a lot of storage and invest in better backup using the 3-2-1 backup strategy. For now, this is what have and I am happy with it!
This blog is stored on my NAS and I thank you for reading it!